Broccoli-Cheese Soup, improved

Back in the mists of time — during the Soup365 experiment, to be exact — I was attempting to cook and blog a soup a day. Most of the soups were just fine. Some were goddamn delightful. And a few… a very few… were deep existential disappointments.

Soup #51: Broccoli-Cheese Soup was such a one. I still recall my bitter annoyance at its drab color, its unappealing sameish texture, its startling lack of distinct flavor. So I have largely avoided making any sort of veggie-cheese soup ever since.

But Friday was dreary and rain and blah, perfect soup weather, and I didn’t much feel like cooking up any sort of hunk of meat. So at Fisher’s enthusiastic agreement, I essayed a new take on broccoli-cheese soup, going by feel rather than recipe. And I think I can say, quite honestly, that this soup has been redeemed. The mustard gives it a delightful zip that cuts through the decadence of cream and cheese, and cooking the broccoli separately keeps it both brightly colored and sprightly flavored.

Re: cooking the broccoli separately — I recently picked up this awesome set of Instant Pot accessories, which included two different spins on steamer racks/baskets. The little footed basket was perfect for steaming the broccoli (as it would be for any little fiddly bits of food). The mesh is fine enough to keep everything contained while it bathes in the steam. The set also includes goodies like a double egg steaming rack, silicone egg bites mold, mini cheesecake pan, and three handy-dandy fridge magnets printed with Instant Pot cooking times for all sort of food. Well worth the $32!

No pictures of the soup, sorry–but it was a lovely golden color!

Broccoli-Cheese Soup
I thought it would make leftovers, but three of us managed to polish off the whole pot. Would be quite easy to double.

2 medium crowns broccoli, chopped into roughly 1/2″ pieces
4 Tbsp butter or ghee
1 large yellow onion, very finely diced
Plenty of salt
3 cloves garlic, minced
1 tsp hot ground mustard
2-3 tsp Northwoods Seasoning from Penzeys (it’s a mix of coarse salt, paprika, black pepper, thyme, rosemary, granulated garlic, and ground chipotle–super useful and I recommend getting some!)
1/4 cup all-purpose flour
2-1/2 cups chicken or vegetable broth (I used, as ever, Better-than-Bouillon)
1/2 cup heavy cream and 1-1/2 cups milk, or 1 cup half-and-half and 1 cup milk
2 packed cups grated sharp cheddar (I used Tillamook Extra Sharp)
Freshly ground black pepper

Steam the broccoli briefly until just tender; set aside. (I gave mine 4 minutes on Steam in the Instant Pot and it was perfect.)

Melt butter over medium-low heat. Add onion and a few generous pinches of salt. Sweat, stirring occasionally, until onion is wholly translucent and beginning to brown in places, about 10 minutes. Add garlic, mustard, and Northwoods Seasoning and cook, stirring, until garlic becomes fragrant, about 30 seconds more.

Increase heat to medium and whisk in flour. Cook, stirring constantly, until flour loses raw smell and color, about 1 minute. Gradually whisk in broth, then cream/milk mixture. Allow to simmer for a few minutes (this is a fine time to grate the cheese). Whisk in cheese, bit by bit, until melted.

Add broccoli and heat through. Taste and add salt and plenty of pepper to taste.

Serve with crusty bread or hot biscuits. Mmmmm.

Posted in Uncategorized | Leave a comment

Why leave well enough alone?: an adventure with Southeast Asian chicken curry

When you plan to bring dinner to a friend, it’s probably best to make sure that the dish you want to bring is not something s/he acknowledges as a specialty.

Fortunately, there’s more than one way to do a “chicken curry,” as I promised to my friends D & D last week. I abandoned my original Indian idea and decided to go Thai instead. And then at New Seasons, I found Kuy’s Cambodian Sauces, a locally-produced line of curry and other seasoning pastes. “Why not?” I thought to myself, and so I picked up their red curry paste instead of the standard Thai variety. Then, on second thought, I decided the original recipe (from BBC Good Food) was entirely lacking in the vegetable department, and so I added carrots and kale and a couple other things.

Here’s the end result. It was not terrible. In fact, I picked up the necessary stuff to make it again this week.

Southeast Asian Chicken Curry
2 shallots, very thinly sliced
1 stalk lemongrass, outer layer removed, tender part thinly sliced
1 Tbsp peanut or other vegetable oil
1 heaping Tbsp red curry paste
1-1/2 lbs boneless, skinless chicken thighs, cut into chunks
1 Tbsp fish sauce
Juice of 1 lime
1 tsp sugar (I used raw/Demarara)
4 medium carrots, peeled and sliced
About half a 10-ounce bag of kale (or, obv., some washed/trimmed/torn into large chunks kale)
1 11-ounce can coconut milk, well shaken
Chopped fresh basil and/or cilantro
Heat the oil in a large, shallow pan. Add shallots and lemongrass and saute over medium-low heat, stirring frequently, until fragrant and and shallots are translucent, about 5 minutes. Add curry paste and cook, stirring, for 1 minute more. Add chicken and cook, stirring, until coated.
Add fish sauce, lime juice, sugar, carrots, and kale. Cook, stirring frequently, for about 3 more minutes, until kale begins to wilt. Add coconut milk. Bring JUST to a boil; reduce heat to a gentle simmer and cook, stirring regularly, until chicken is cooked through, about 15 minutes.
Stir in half of chopped herbs. Taste and add more curry paste and/or salt if you feel it needs it.
Serve over steamed jasmine or basmati rice in shallow bowls, garnished with additional chopped fresh herbs.
Posted in Uncategorized | Leave a comment

Thanksgiving Tradition, or, the soup blog lives!

Anything can become a tradition if you repeat it enough times.

That’s certainly the the case for this soup. Creamy with butternut squash, pungent with onions and curry powder (yet not overwhelmingly so), lightly sweet with apple. It’s made an appearance on our Thanksgiving table for ten years running, and its relative simplicity makes it a perfect foil to the complement of complicated, heavy dishes that usually pop up alongside.

Without further ado, here’s our Newman family tradition.

Curried Butternut Squash-Apple Soup, adapted from The Silver Palate Cookbook
4 Tbsp butter
2 finely chopped yellow onions
About 1.5 Tbsp curry powder
2 small to medium butternut squashes
3 Granny Smith or other tart apples
3 cups chicken or veggie broth/stock
2 cups apple juice
Salt (plenty) and pepper

Melt butter in a soup pot over low heat. Add onions and curry powder, stir well to combine, and cook over low heat about 25 minutes, stirring regularly. This should smell ridiculously good.

Meanwhile, peel, seed, and chop the squash. Peel, core, and chop two of the apples. After 25 minutes, add to pot along with broth. Bring just to a boil, cover, reduce heat, and simmer until squash is falling-apart tender. This will take more or less time depending on how finely you’ve diced the squash; for me, it usually takes another 25 minutes or so.

If you are blessed with an immersion blender, use it to purée the soup in situ until very smooth. If you are not so blessed, put a large colander over a bowl and strain the soup, retaining the cooking liquid. Put the solids in a food processor (in batches if necessary), add a cup or so of the cooking liquid, and purée until very smooth. Return to pot.

Stir in apple juice and return soup to low heat. If you used a food processor, add another cup to two cups of cooking liquid until soup is of an agreeable consistency. Heat through, stirring frequently. While reheating, shred the (unpeeled) third apple. Taste soup and season generously with salt and pepper.

Garnish each serving of hot soup with an attractive sprinkling of shredded apple (and maybe even a swirl of creme fraiche, should you be feeling super fancy). Mmm, tradition!

Posted in Uncategorized | Leave a comment

Sole Meunière: French for “so delicious I can’t believe it was also easy”

Warning: this dish is not for butterphobes.

It is for everyone else. Even you, Ms./Mr. I-don’t-like-fiiiiiish.

It’s so delicious it’s probably even worth splurging on Kerrygold or some other really good butter, though it’s also (as tonight’s meal proved) just fine with plain ol’ grocery-store butter. But if you’re one of those odd people who uses “vegan buttery spread” or (horrors!) actual margarine, well, please refer back to the first sentence of this post. I will not be held responsible for your unspeakably nasty results.

“Meunière” is French for “miller’s wife,” which I guess is probably a reference to the use of both flour (I’m thinking you could probably also use almond flour and it would also be delicious… will report back soon) and of butter, which of course was an expensive ingredient in Days of Yore and probably only accessible to people who were either comparably well-off or who had their own milch cows or whatever. Fortunately, these days, butter is not too expensive. Even the Kerrygold sort is only about $6 for a pound, which should last you at least a week if you go through butter like we do, and the Dover sole I used was, likewise, about $6 for a pound at Trader Joe’s. And, it being a classic French preparation, of course there are lots of variations on how to make it. This is what I did.

Sole Meunière
Serves four

About one pound Dover sole fillets, thawed if frozen, rinsed and patted dry
1/2 cup or so flour (almond flour? why not?)
1/2 to 1 tsp EACH kosher or sea salt and ground black pepper
4 to 6 Tbsp butter (more is better, seriously), cut into chunks
1 medium lemon

Rinse the fish, pat it dry, and set aside. Preheat oven to a nice warm temperature (ours doesn’t go below 170, so that’s what I used). With a fork, stir together flour, salt, and pepper in a shallow plate.

Dredge fish in flour and lay pieces on a baking sheet as each is lightly coated. (Some recipes call for dipping the fish in milk before dredging, but I didn’t do this and it worked just fine.)

Heat a large, heavy pan (cast iron is excellent! nonstick is nasty!) over medium-high heat. Add butter and cook, swirling pretty much constantly, until butter first melts, then foams, then turns a lovely nutty brown. Do not walk away and ignore the pan. Do not let the butter burn, because yuck.

Turn heat down to medium-low and give the butter several seconds to acclimate. Add a few pieces of fish, making sure you don’t crowd the pan. Cook for 1-1/2 to 2 minutes; carefully flip and cook on other side for the same amount of time, until just cooked through. DO NOT OVERCOOK. As fish is finished, remove it to a clean plate or baking sheet and put it in the oven to keep warm while you cook the next batch of fillets.

While the last batch is cooking (remembering to keep an eye on it as it does so), cut the lemon in half. Juice one half. Slice four heart-rendingly thin slices from the other half.

Plate the cooked fish (you can, if you like, rest it on a lovely little bed of this ridiculously yummy artichoke-olive tapenade). Drizzle each fillet first with a little lemon juice, then with some of the heavenly browned butter. Make it all purty and fancy-like by garnishing with a lemon slice.

Seriously, you can whip this up in ten minutes (fifteen, max) and your family/friends/lover/roommate/cat/whomsoever will gaze admiringly and adoringly upon you and you will be all “oh, this silly little thing? It’s français, mon ange,” and then let us just draw a curtain on the rest of this domestic scene.

Posted in Food and Drink, Recipes | Tagged , , , , | 1 Comment

A roasty, toasty, Paleo feast

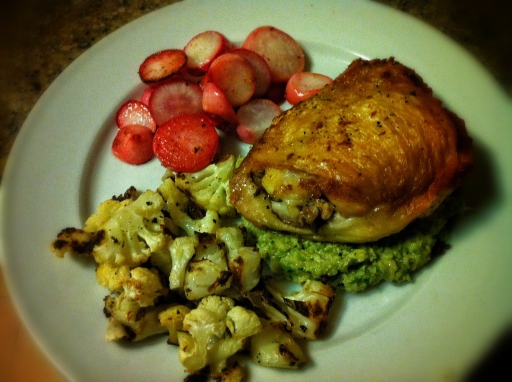
IMG_4223

Lotsa veggies, lotsa fatty goodness, no grains.

Pan-Roasted Chicken Thighs
Artichoke-Olive Tapenade
Roasted Cauliflower and Radishes

If nothin’ says lovin’ like somethin’ from the oven, then this meal was the purest expression of affection imaginable. Also, it tasted delicious, wasn’t overly expensive, and was pretty damn healthy to boot. Wins for everyone!

So in the eternal quest for slenderness, I’ve been trying to cut down on carbs (specifically grains). This is probably easier to do in Portland than just about anywhere else, since we’re home to lots of food-weirdness-pandering palaces like Dick’s Kitchen, where I recently had a stellar kale salad with vegan Caesar dressing and grilled grass-fed beef patty, but that’s another story and will be told another time.

But if you’ve ever tried to cut carbs and grains out of your diet, you may have noticed one problem in particular: “Real food” meats and veggies can be, to put it mildly, crazy expensive. I’d personally love to dine on nothing but organic hand-raised pasture-fed critters and produce lovingly gathered at daybreak from family-owned farm stands, but the reality of our budget (currently -$13 in the checking account, yay!) pretty much limits our grocery shopping to whatever is on sale at WinCo, Fred Meyer, or (occasionally) New Seasons. (New Seasons has the best milk. Seriously. It is so good.)

So when I found family packs of chicken thighs on sale at Fred Meyer for 79 cents a pound (in the Used Meat section, no less), I jumped on that like it was a Pony and I was a Cutie Mark. Brought home 4 pounds of chicken thighs, tried pan-roasting half of them the first night, and was so happy with the results that I cooked the rest the same way the next night and served them over an artichoke and olive tapenade.

The skin on the thighs crisps and browns perfectly so that it breaks into little shards of deliciousness when you crunch into it. The tart, salty bite of the tapenade stands up to the chicken’s velvety richness, and the mildness of the roasted cauliflower and radishes (roasted radishes lose nearly all their pepperiness) makes a delicious foil to the meal’s other strong flavors.

The chicken is done from start to finish in about half an hour, and most of that is just unattended cooking time. The tapenade is easy to make ahead if you like (next time I’ll probably make a full or double recipe just so we have it sitting around). You can even prep the cauliflower and radishes earlier, leave them sitting on the counter, and go spend 45 minutes watching “Legend of the Seeker” like I did last night. Everything roasts at the same temperature, so it doesn’t require any finessing (though you’ll probably want to do some rearranging halfway through cooking if you’ve got a wee tiny oven like I do).

Pan-Roasted Chicken Thighs (from Bon Appetit)

  • 4-6 medium to large bone-in, skin-on chicken thighs
  • Coarse kosher or sea salt
  • Freshly ground black pepper
  • 1 Tbsp peanut (or vegetable) oil

Preheat oven to 475°. Season both sides of chicken thighs with salt and pepper. Set a large cast iron skillet over high heat and add the oil. Heat oil until it is shimmering but not smoking (if you see smoke, turn the heat down just a bit). Add chicken, skin side down, and cook for two minutes. Reduce heat to medium-high, rotate pan a quarter turn, and continue cooking until skin is deeply golden brown and fat has rendered, about 12 minutes. Rearrange chicken pieces and rotate pan another quarter turn every few minutes so chicken cooks evenly. Watch for spattering!

Carefully transfer pan to hot oven and roast an additional 13 minutes. (If you have an exhaust hood, you might want to turn the fan on. If, like me, you aren’t that fancy, you might want to open a kitchen window in case of smoke.) Flip chicken pieces and roast, skin side up, an additional 5 minutes or so. Remove from oven, transfer chicken to plate, and let stand 5 minutes before serving.

Seriously. That’s it. Unless you want to get all crunchy-Portland like me, in which case you can let the hot chicken fat cool slightly, then strain it through cheesecloth or a fine-meshed sieve into a ubiquitous Mason jar. Look: Schmaltz! You can cook with it (fried potatoes ZOMG) or add a little to any savory dish to boost its savory goodness factor.

Serve chicken, if you like, on a bed of this exquisitely yummy tapenade:

Artichoke-Green Olive Tapenade (adapted from The Primal Blueprint Quick and Easy Meals)

  • 1 can water-packed artichoke hearts, drained
  • About 3/4 cup pitted green olives (I used Castelvetranos), drained if packed in brine
  • 2 tsp capers, drained
  • 1 clove garlic, roughly chopped
  • 1/4 cup chopped fresh parsley
  • 1/4 to 1/2 tsp cayenne
  • 3 Tbsp olive oil, divided
  • Salt to taste

In a food processor, combine artichoke hearts, olives, capers ,garlic, parsley, and cayenne. Pulse until well chopped but not completely smooth, scraping down sides occasionally. Remove any large, tough chunks of recalcitrant artichoke. Continue pureeing while drizzling in 2 Tbsp olive oil; puree to desired smoothness (I thought it was nice to retain a little body). Taste and add more cayenne plus salt if needed (it won’t need much, if any). Set aside, or refrigerate if not serving for a while. Let it come back to room temperature before serving. Just before serving, stir in remaining 1 Tbsp olive oil and recheck for seasoning. (You may end up eating a good quarter-cup or so at this point, just to “make sure it’s all right.”)

Dab about 1/3 cup tapenade onto each plate and top with roasted chicken thighs.

Rhys helping prep the radishes

Rhys helping out by cleaning the radishes. Next time I’ll let him handle the whole project.

Roasted Cauliflower and/or Radishes

  • 1 head cauliflower and/or 2 bunches radishes
  • Olive oil
  • Salt and pepper and red pepper flakes if you like
  • Juice of 1 lemon

Preheat oven to 475°. Chop or break cauliflower into florets. Scrub, top & tail, and halve radishes (cut into thirds if they’re large). Toss each vegetable separately with a couple tablespoons of olive oil, salt, and pepper. Add red pepper flakes to the cauliflower if you want it spicy. (Also a good option: a teaspoon or two of curry powder; whisk this into the olive oil before tossing.) Spread (again, separately) on rimmed baking sheets. Roast 15-20 minutes or until tender, stirring halfway through and rearranging pans if your oven tends to have hot and cold spots (as mine does). Toss radishes with lemon juice before serving.

Posted in Recipes, Vegan, Vegetarian Option | Leave a comment

How do you solve a bunch of tomatillos?

…How do you eat them ‘fore they all go bad?

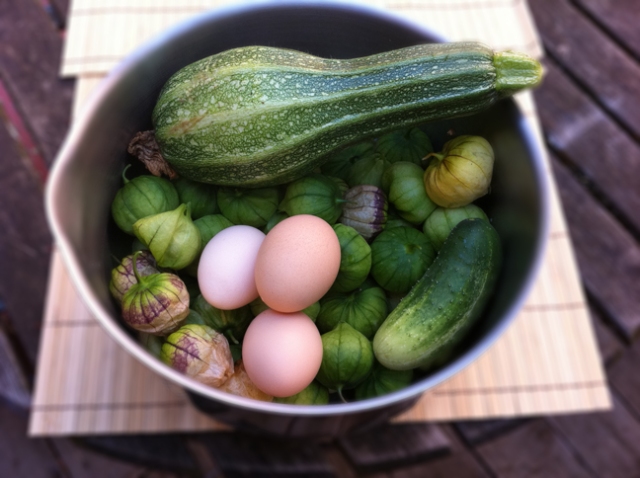
So we had a bumper crop this year. As in, one can no longer turn around in our kitchen without bumping into crop. The tomatoes, after a slow start, did remarkably well. And I learned that “determinate” Romas are just that: They go from all-green to all-red-and-you-best-pick-us-now-or-we’ll-rot-on-the-vine in approximately 17 seconds. My second bunch of slow-roasted Romas is perfuming the kitchen right now. (I was so excited about this project that I actually cleaned the oven for the first time in… well, ever.)

Last year, the tomatillos were the top performers in our garden. They did well. So well, in fact, that this year I planted three of them rather than two, which is sort of a counter-intuitive response to discovering that a given plant produces OH HOLY HELL THAT’S A LOT.

And so for the last several weeks, we’ve been harvesting half a pound or so of tomatillos at a time. Very nice. But perhaps a bit intimidating if you don’t already have lots of plans for this shiny green bounty. So periodically over the next few days/weeks, I’ll post some of the ways we come up with to take advantage of these tasty, oh-so-prolific little powerhouses.

First up: a Rick Bayless-style salsa verde, which has the dual advantages of being ridiculously delicious and pretty darn easy to make. It’s perfect for zazzing up a meal of tacos, burritos, plain ol’ beans, grilled chicken/pork/whathaveyou.

Tomatillo Salsa
Makes about 2 cups; easy to double or triple or quadruple

About 1 pound tomatillos, husked and rinsed
1 to 3 chiles of your choice, either jalapenos or serranos, halved, seeded to cut the heat if you like
1/2 to 1 white onion, roughly chopped
Fresh cilantro to taste; start with about 5 or 6 sprigs, increase if you like, roughly chopped, stems and all
Zest and juice of 1/2 lime (optional)
Salt

Put the tomatillos and chiles in a saucepan with enough well-salted water to barely cover them. Bring to a boil, cover, and simmer until tomatillos are just tender. This will only take about 5 minutes if they’re itty-bitty like mine tend to be; up to 10 minutes if you’ve got bigger/tougher specimens. Drain.

Put onion, cilantro, lime zest/juice, and a couple of pinches of salt in the bowl of a food processor. Pulse briefly to chop. Add drained tomatillos and chiles and pulse to puree until smooth-ish but still in possession of a bit of texture.

Taste and season with salt (no pepper) medium-generously.

Once you have this basic salsa down, the world is your oyster, tomatillo-ishly speaking. It’s fantastic combined with a mashed ripe avocado for a dip that is not technically guacamole. It can turn canned refried beans and Santitas tortilla chips into ZOMG nachos. You may also can it following standard hot water bath-instructions so that you may enjoy a bit of zesty summer freshness all long miserable rainy season long. (Unless you live in the Great Northwest, in which case there is no amount of zesty summer anything that is going to get you through the 14-month rainy season.)

Posted in Uncategorized | Leave a comment

Thai-Esque Pork with Papaya

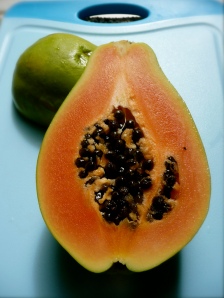
Photo by Flickr user Reeding. Used under a Creative Commons license.

A few months ago, in one of those temporary mental orgies of Healthful Living, I subscribed to Clean Eating magazine. Lots and lots of food-porny photos of heavy-on-the-veggies meals, lots of recipes that sound really really good until you start getting into them and realizing they call for nonstick skillets and “1 tsp canola oil” and reduced-fat cheeses and other nonsense up with which I will not put. But the veggie (and fruit) focus still appeals, and man those photos sure do look yummy, so I’m giving some of them a sort of a try anyway.

This one started out as the cover recipe for July 2011, “Thai Pork and Papaya with Couscous.” I had never cooked with papaya before (actually, I don’t think I’d ever even eaten papaya outside of a smoothie/Jamba Juice context), and this recipe called for just dumping the raw papaya chunks in at the end, which did not sound super-great. It also called for ground ginger, which sounded similarly non-super-great. Anyway, by the time I was finished changing it all around, it worked a little something like this.

Thai-Esque Pork with Papaya
Serves four

2 Tbsp peanut or other neutral-flavored oil
1 jalapeno or other hottish pepper, seeded if you like, minced
4 cloves garlic, minced
About a 2″ piece of fresh ginger, minced or Microplaned
2 Tbsp soy sauce
1 to 2 Tbsp Thai fish sauce
1 pork tenderloin (about a pound-ish), cut into thin slices
About 1 to 1.5 lb papaya (the one I bought was just over two pounds, so now I have a chunk of papaya mooning about in my fridge), peeled, seeded and cut into 1/2″ cubes
Juice and zest of 1 lime (my lime was looking a bit spotty, so I only zested about half of it)
A few generous handfuls of baby spinach leaves

Heat the oil over medium heat in a generously sized skillet (I used my 12″ cast iron skillet). Add chile pepper, ginger, and garlic; stir furiously for about 30 seconds, taking care that garlic doesn’t brown.

Add pork, soy sauce, and fish sauce. Increase heat to medium-high and cook, stirring constantly, until pork loses pink color, about 2 minutes. Add papaya and continue cooking and stirring for another minute or two. Pork will cook through very very quickly. Don’t overcook it or it will go from “tender yum” to “shoe leather” faster than you can say “whoops, that was stupid.”

Remove from heat. Immediately stir in lime juice/zest and spinach. Add a half cup or so of chopped cilantro if you have it on hand (I didn’t, but it would’ve been yummy).

Serve over rice or be all anti-traditional (as I did, as Clean Eating suggests) and serve over couscous instead. Pan-culturality! Let’s eat!

Posted in Food and Drink | Tagged , , | Leave a comment

Mascarpone-Amaretto Stuffed Apricots

The ODB is down with MSP

So what could be worth breaking nine months of radio silence for? These little pieces of heaven, that’s what.

They’re sweet but not too sweet, creamy but not cloying, just exotic enough to stand out without overwhelming timid tasters with anything weird.

And after the third or fourth time I was specifically requested to bring them to some sort of Happening, I figured it was time to share them with the world. I can’t recall where I got the original recipe, but I’ve tweaked it to the point that it may or may not be unrecognizable.

Mascarpone-Amaretto Stuffed Apricots
Yield: approximately one crap-ton, or at least it feels that way while you’re making them, but it never really comes out to be enough

A quantity of dried apricots, preferably the unsulfured Turkish variety, which are kind of a peculiar brown hue but taste better nonetheless
A 4-ounce (I think) carton of mascarpone; you could also use cream cheese if you can’t find mascarpone anywhere, but you’ll need to whip it for a good while all by itself first, also the result will be much heavier and tangier
1 tsp to 1 Tbsp honey, depending on your personal liking
About 2 tsp freshly squeezed lemon juice (and perhaps a bit of the zest, if you’re feeling frisky)
1/2 tsp ground (or, better: freshly grated) nutmeg
A pinch (only!) of salt
2 to 3 Tbsp amaretto liqueur
About 1/2 cup blanched almonds, very very finely chopped/minced/pulverized, divided

In a small bowl, beat the mascarpone for a few seconds with a hand mixer on low speed to lighten. Add honey, lemon juice, nutmeg, salt, and amaretto; beat on low speed until combined. With a rubber spatula, fold in a few tablespoons of the chopped almonds.

Scoop about a third of this mixture into a pastry bag, should you be fancy enough to own one, or into a Ziploc bag, should you be me and not be so fancy. If you’re using a Ziploc bag, seal the bag and snip off one of the bottom corners. Put the remaining chopped almonds in a shallow plate.

Pick up an apricot and look for the cut where the pit was removed. With a small knife, widen and deepen the cut until there is a generous pocket in the apricot (but don’t cut all the way through it). Squeeze about a teaspoon of mascarpone mixture into the pocket. Press apricot gently to even out filling. Roll cut edge in the chopped almonds; set finished apricot aside; pick up another apricot and repeat, repeat, repeat. This is not a difficult process, but it is a fairly time-consuming one.

These are especially nice if you chill them a little before serving. I imagine they would be lovely with some Champagne, because what isn’t?

N.B.: If you’re wondering what Ol’ Dirty Bastard has to do with mascarpone-stuffed apricots, well, I needed a background so my photo wouldn’t just be one lonely apricot floating in space, and this stamp I carved last week seemed to fit the bill.

Posted in Food and Drink, Snacky Goodness, Vegetarian | Leave a comment

Bacon Rice Krispie Treats


Bacon Rice Krispie treats


I never really got on the add-bacon-to-it bandwagon. Bacon, though a wonderful thing in and of itself, doesn’t particularly cry out to be deep-fried and served with gravy, infused into vodka, or basket-woven around a slab of sausage and grilled. At least not in my world.

The idea for these came to me in a dream, though, I think, and I became a little bit obsessed with them.  So I gave them a try, and they were good. And then I tweaked the recipe and gave them another try, and they were better.

This definitely doesn’t count as health food; on the other hand, you can set these out at a gathering and pretty much guarantee they’ll be gone in just a few minutes, thereby sparing you the agony of continuing unhealthy temptation. So… why the heck not? Immerse yourself, however briefly, in the world of stunt bacon cooking.

You need to start with some brown sugar bacon. Which you’ll need to make yourself.


Making brown sugar bacon


Brown Sugar Bacon
Preheat oven to 275. Line a rimmed metal baking sheet with aluminum foil and place a metal rack on the sheet.

Put about a cup of dark brown sugar in a shallow dish. Dredge thick-cut slices of bacon in the sugar, turning to coat and patting the slices gently to encourage the sugar to adhere. Don’t go hog-wild (hee) with the sugar, because the excess will melt, drip off and potentially burn. Arrange the slices on the metal rack. You’ll need about 1/3 to 1/2 pound for this recipe. Your family will be happy to eat any excess.

Bake for about half an hour, maybe up to 40 minutes. This will seem like it is taking forever, but it will smell really good. The bacon will not get crispy at this point. When it seems sufficiently done, remove the sheet and carefully pour off the molten bacon fat into a small bowl. Using tongs, remove the bacon to a paper grocery bag or other nice sturdy absorbent draining surface. (Don’t use paper towels. They will stick to the hot sugar and ew.) Let bacon cool for about half an hour or so, during which time it will crisp up a bit.

Now you’re ready to proceed with:

Bacon Rice Krispie Treats
3 Tbsp bacon fat
2 Tbsp butter
5 cups mini marshmallows
A splash of vanilla extract
2 generous pinches kosher salt
1/2 tsp Drunken Angel or other hot sauce, to taste (optional but highly recommended)
5 cups Rice Krispies cereal (don’t try to get away with the generic kind; they’re just not as good)
About 1/2 pound Brown Sugar Bacon, chopped fairly fine

Thoroughly grease a 9×13 baking dish. Put Rice Krispies in a large bowl and toss with chopped bacon.

In a medium saucepan, combine bacon fat and butter; cook, stirring, over medium-low heat until melted. Add marshmallows, vanilla extract, salt and hot sauce. Cook, stirring constantly, just until marshmallows are completely melted. Pour mixture over Rice Krispies and stir gently to distribute.

Scrape mixture into greased baking dish. Wet your hands and pat mixture into an even layer. Let cool before serving. These are best the day they’re made, though honestly no one will complain about eating them the next day either, and they probably won’t last that long anyway.

Posted in Bacon!, Drunken Angel Hot Sauce, Food and Drink, Recipes | Tagged , | 1 Comment

Potato Tortilla

No, not that kind of tortilla, silly.. the flat Spanish omelet-type thing that’s pretty much just a showcase for veggies or cheese or whatever, loosely bound together with egg.

The nice thing about this recipe is that it’s adaptable to pretty much whatever you have on hand. Zucchini? Why not? Spinach? Oh sure. Jicama? Well, that might be a little weird, but probably not un-doable. Bananas? You’re on your own there, buddy.

Cooking the potatoes first pares the tortilla-cooking time to almost nothing. And yep, traditionally this is made with ultra-thin sliced potatoes fried in the same pan, but (1) I am not so much for the frying of the food, and (2) the purpose of this recipe was to load up on vegetables. Which it did.

Tortilla de Patatas
Serves six-ish

3 medium russet potatoes, scrubbed, unpeeled, and cut into roughly 3/4″ cubes
About 2 quarts cold water with plenty (!) of salt added
2 Tbsp olive oil
1 medium onion, diced
2 small-to-medium red bell peppers, cored, seeded and chopped
1 or 2 jalapeno pepper(s), seeded (or not) and minced
3 to 6 cloves garlic (depending on their size), minced
A couple teaspoons of Montreal steak seasoning, purchased or homemade (or: coarse salt, black pepper, paprika, red pepper, ground thyme)
8 eggs, beaten
1/2 to 1 cup finely shredded cheese (I used sharp Cheddar)

Put the potatoes into the salted water, bring to a boil, cover, reduce heat and simmer until potatoes are just tender, about 7 minutes. Drain and set aside. Preheat the broiler to medium.

In a large skillet–cast-iron if you have it, nonstick if you don’t, in which case make sure it’s broiler-safe before you get too much further–heat the olive oil over medium-heat. (Really, cast iron is going to work better than anything else here.)

Add onion and peppers. Cook, stirring regularly, until softened and barely translucent, about 5 minutes. Add garlic, jalapeno and seasonings. Cook and stir 1 minute more. Add potatoes and cook, stirring very gently, for just a few seconds to get them all coated in the nice yummy oil.

Pour the eggs into the pan. Shake gently but determinedly to distribute everything around fairly evenly. Fold the eggs into the mixture very briefly. Then step away and leave the pan alone until the eggs are set enough that they don’t jiggle (tee hee) when you shake the pan. Three or four minutes, tops.

Sprinkle cheese evenly over the top of the tortilla. Pop the pan under the broiler and let it cook for a few minutes until the top is bubbly and the cheese is starting to brown. (Probably another three or four minutes.)

Cut into wedges and serve; for a super happy fun time, top each serving with a dollop of homemade guacamole.

Posted in Recipes, Vegetarian | Leave a comment